Wednesday 27 January 2016

Conclusion

Reflecting back, I'm glad I decided to learn animation, however, I feel as if I had spent more time learning anatomy, my final piece would've been better off. The final piece follows anatomical drawing rules, however is exaggerated as I didn't feel strong enough to animate something more realistic. However, it could be considered, had I done that, whilst the character design might’ve been better, the animation itself would not have, since I dedicated more time to learning that, than to learning anatomy.

Another step I would've changed in the learning phase is bone-based, as I had little time to do more with it. Dedicating only a week to it meant I only got the basics, and while I do feel the final bone-based animation works well, it is also very basic and shows the cap of my knowledge on the principle, technology and subject.

Next, I feel like the frame-by-frame animation went well, and though it has blemishes, the final animation is a competent running frame for a non-existent ninja game, running like an exaggerated, cartoon ninja. It’s smooth, and flows well. Though, in contrast to this, I feel as if it’s over animated. The excess of frames for such a simple running animations makes it look strange and fluid, as if the character is almost melting.

If I were to do the process again, I’d spend more time on anatomy, and bone-based animation. I feel like these were the aspects that, in the end, I knew the least about coming out of. Though one can argue anatomy can take years for an artist to learn completely, and I’ve only ever had basic learning in it. I’d like to continue learning more about the principles and finer elements of a anatomy after this experience, in my own time.

Another aspect I feel like I’d like to spend more time on, as I feel I left it out, is keeping lines and sizes of the character consistent throughout the animation. In the frame-by-frame one, you might notice the character’s body parts sometimes change size slightly, and this is something I never bothered learning how to avoid. Lines get shaky, which due to the high frame rate, isn’t too noticeable, but when noticed, makes the character appear to be melting, or even like liquid.

Aspects I feel went well, were the smoothness of each animation, and the weight, in context, of the stealthy character’s quick movements, with well intentioned footsteps that hit the floor with correct weight. The bone-based animation was also made easier from having learned these principles from traditional frame by frame.

Overall though, I feel like these two skills will help me in the future as an artist and animator, especially as bone-based makes the process easier and learning it may lessen time spent animating in the future. However, frame by frame animation is also important and I’m glad I learned more, as it is still used in games today, and is a key skill to have.

Word Count: 499

Week 5-Bone Based, In Unity

The first thing done here, is setting up a Unity project. Within here, I import the spritesheet made from the frame animation and set the sprite sizes, pulling it into the scene and saving it as an animation, then I bump the speed up to 3 for a smooth animation. Next, I created the parts for a bone-based ninja, importing it into Unity, and then following what I’d learned about bone-based animation to recreate it. This took some time, to perfect the leg motions. After positioning them, and the camera, I built the scene as an exe.


Word Count: 97

Time Spent:
Creating Sprites: 1 hour
Animating and Refining: Bone Based: 2 Hours
Finishing the Scene: 30 Minutes.

Total: 3 Hours, 30 Minutes

Monday 11 January 2016

Week 4-Refine, Inbetweens, Colour

This next step was refinement. After testing the animation, I decided it needed to be more fluid. I started off by planning 8 more inbetweens. These will add some fluidity to choppier elements of the motion, and I placed them in a way to fix parts that weren’t as fluid. I planned them using anatomical skeletons.


After I finished the inbetweens, I extended each keyframe by 2 frames, giving them more weight and importance. Finally, I coloured the frames.
The next step is to compile a spritesheet, and then add it in engine, then recreate this animation using bone-based tools.


Word Count: 100


Planning the Animation: 1 Hour 30 Minutes
Creating the Inbetweens: 5 Hours
Colour: 1 Hour 30 Minutes
Reviewing the Animation (In order to know what needed changing): 1 Hour

Total: 9 Hours

Sunday 10 January 2016

Week 3-Inbetweens, Motion, Test

I created the next batch of inbetweens for the keyframes, 3 for each transition. This is a simple number to keep the movement timing consistent throughout, which benefits a game animation, that a player may always be looking at throughout the game.


I planned each step using basic anatomy models, posing them to give myself an understanding of the movement, and also keep the character’s anatomy mostly consistent.


Finally I created a spritesheet and imported it to Unity to test it. It requires some more inbetweening, and the keyframes need to be more prominent to add weight to each step.


Word Count: 100

Time Spent:
Planning the Animation: 1 Hour 30 Minutes
Creating the Inbetweens: 5 Hours
Creating the Spritesheet: 1 Hour
Editing and Creating the Unity File: 30 Minutes
Total: 8 Hours

Saturday 9 January 2016

Week 2-Keyframes, Inbetweens and Planning Motion

The first step I took was to look at real-life references. Even when exaggerating motions it’s important when animating to observe real life and not just animations. Doing so strengthens your view of motion, and weight.

Next, I planned keyframes. Then, created them. These are the extremes of the animation, important poses that make the movement work. These would work as an, albeit choppy, running animation.


After this, came planning, then creating, inbetweens for the first step. These are slightly off-model, but that’s fine, the important step is the keyframes, inbetweens merely leading us to them in a fluid way.


Word Count: 100
Time Spent:
Studying References: 2 Hours
Planning the Animation: 1 Hour
Creating the Keyframes: 2 Hours
Creating the Inbetweens: 2 Hours
Total: 7 Hours

Friday 11 December 2015

Week 1-Making: Model Sheet & Character Design

Now comes putting my learnings into practice, and the first thing to do was design a character to animate. This week, I began by sketching ideas of anatomy, following what I’d learned in regards to that, and following it. My ideas were a “Rambo”-esque soldier, a Ninja, and a robot.


Then I expanded these, and chose the Ninja. This would allow for a fluent final animation set showing knowledge of anatomy, mass and weight, with the benefit of being fun to animate and a challenge in bone-based. Whereas the other two characters felt more rigid, and easier to animate.


Word Count: 100 Words

Time Spent:
Sketching: 2 Hours
Final Digital Versions: 2 Hours
Total: 4 Hours

Thursday 3 December 2015

4th Week of Learning: 2D Bone Based

Bone based animation is the process of structuring whatever is being animated around bones, these moving the object.

First of all, I used a tutorial and its assets to learn how to do this in Unity. One has to make the body the main parent of the hierarchy and order everything else to parents semantically. EG, thigh is parent of the calf. Then, we can animate this in Animator using rotations without Children parts moving away.


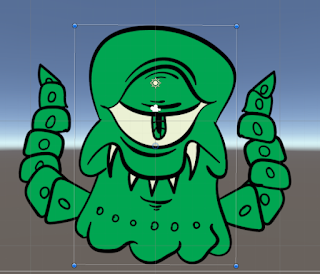
After this, I created 2 original animations. A robot, and a squid monster, as the tentacles needed many segments to work in animation.


Words: 99

Time Spent;
Tutorial: 3 Hours (3 Animations)
Robot: 2 Hours (1 Animation)
Squid Monster: 2 Hours (1 Animation)
Total: 7 Hours